2014 Newest Fully Automatic Chicken Egg Incubator/ Digital Egg Incubator/ Family Use ...
Nanchang Vena Co., Limited- Port:Qingdao, China
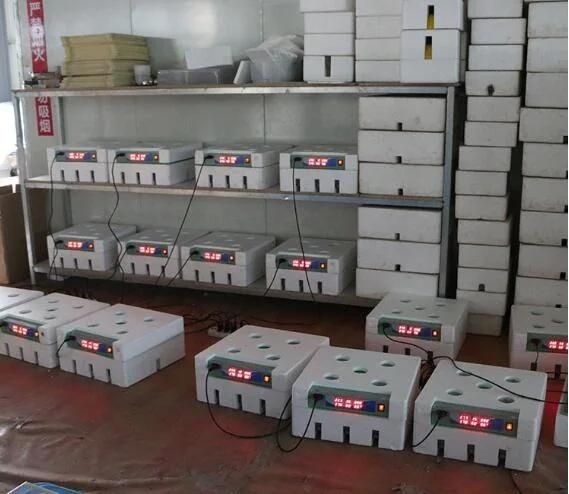
- Production Capacity:10000 Per Month
- Payment Terms:T/T, Western Union, Paypal
- Type:Chicks Hatching Machine
- Usage:Incubation Equipment
- Power Source:Electric
- Brand Name:Vena Incubator Manufactory
- Place of Origin:Jiangxi China (Mainland)
- Appearance:Color Structure of Aluminum Alloy
Base Info
- Model NO.:VA-48
- Packaging Detail:Wooden Package
- Warranty:3 Years
- Hatching Rate:More Than 98%
- Material:Color Steel Panel
- Lifespan:14-16years
- After-Sales Service Providede:Overseas Service Center Available
- Trademark:Vena incubator
- Transport Package:Wooden Package
- Specification:CE
- Origin:Jiangxi
- HS Code:8436210000
Description
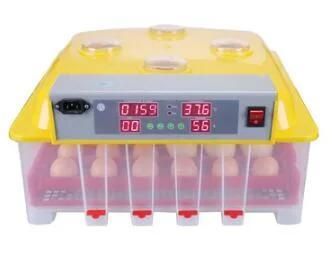
2014 Newest Fully automatic Chicken Egg Incubator/ digital egg incubator/ family use incubator/ mini incubator VA-48
Gross Weight: 7KG
Power: 80W
Packaging Size: 54*54*30CM
Voltage: 220V/ 110V/ 220V&12V
Capacity: 48 eggs
Characteristic:
It is suitable for families and specialized households to incubate chickens, birds, ducks and geese, etc. This machine is produced under strict CE test and has good reputation from the peasants in the rural area.
Egg incubator Product Function
1) Automatic egg turning
2) High and low temperature alarm, high and low humidity alarm
3) Recorded days of incubation
4) Add water outside with free water dropper
5) Lower cover is transparent, very easy to observe
6) Easy to operate. Automatic temperature control and automatic display for temperature&humidity
1. Testing you unit for the first time:
1.1 Connect the egg turner plug to the control plug inside the egg compartment.
1.2 Connect the provided power supply to the back of the unit and your power source.
1.3 Switch on your power source.
1.4 Switch your unit on.
1.5 You will hear an alarm sounding due to low temperature/humidity.
1.6 Press any of the green buttons to cancel the alarm.
1.7 By opening the incubator and filling the water channels you will notice the humidity
Reading increase.
1.8 Let the unit run for 2 hours to note the egg turner turning.
2. Setting the temperature
2.1 Push "SET" once.
2.2 Push "+" or "-" to select the desired temperature.
2.3 Push "SET" once more to exit.
- These incubators are factory set at 38oC, I found the chicks hatch at day 19 to
20 meaning the temperature being to high. Using the method as described
Above. I recommend you set the temperature at 37.6oC.
3. Temperature alarm parameter settings (AL and AH)
The temperature alarm is factory set to sound at 1oC over or below the set temperature. This is sufficient and you do not need to make any changes to these settings.
3.1 Low temperature alarm parameter setting. (AL)
3.1.1 Press and hold "SETT" for 3 sec.
3.1.2 Push "+" or "-" until code "AL" appears in the temperature screen.
3.1.3 Push "SET"
3.1.4 Push "+" or "-" to adjust to your desired lower alarm setting.
3.2 Higher temperature alarm parameter setting (AH)
3.2.1 Press and hold "SETT" for 3 sec.
3.2.2 Push "+" or "-" until code "AH" appears in the temperature screen.
3.2.3 Push "SET"
3.2. 4 Push "+" or "-" to adjust to your desired higher alarm setting.
4. Humidity alarm parameter settings (AS)
The humidity is factory set to sound at 60%.
(Note: It can be adjusted according to your incubating request. )
4.1 humidity parameter setting. (AS)
4.2 Press and hold "SET" for 3 sec.
4.3 Push "+" or "-" until code "AS" appears in the temperature screen.
4.4 Push "SET"
4.5 Push "+" or "-" to adjust to your desired humidity.
- By filling both water channels depend on the local humidity levels and the time of year, and how much water inside the incubator and humidity to determine whether it need to add water or not.
5. Calibrating temperature sensor reading (CA)
The thermometer correct reading is set at 0oC. The reading given by the thermometer can be adjusted if you find that the temperature reading is incorrect using a calibrated thermometer.
5.1 Calibrating the temperature sensor measurement. (CA)
5.2 Press and hold "SETT" for 3 sec.
5.3 Push "+" or "-" until code "CA" appears in the temperature screen.
5.4 Push "SET"
5.5 Push "+" or "-" to adjust to the correct measurement.
- Note that the adjustment is the difference between the thermometer readings
And should be adjusted with "- " if the temperature reading of the incubator is to
High and normal value (indicating + value) if the incubator reading is too low.
| Number | Symbol | Meaning | Factory Setting |
| 3.1 (above) | AL | Low temperature alarm parameter setting | 1 o C |
| 3.2 (above) | AH | Higher temperature alarm parameter setting | 1 o C |
| 4.1 (above) | AS | Low humidity alarm parameter setting | 45% |
| 5.1 (above) | CA | Calibrating the temperature sensor reading | 0 o C |
| 6 (above) | HS | Temperature higher limit set | 39.5 o C |
| 6 (above) | LS | Temperature lower limit set | 30 o C |
| 7 (above) | HU | Heating starts | 18 |
| 7 (above) | HD | Heating stops | 11 |